 設定
設定
ZOOM連携設定
HotBiz8 / TimeBizをZoomと連携させるZOOM連携設定を行うことができます。
Zoomは複数人を対象としたビデオ通話を行うアプリケーションです。
連携する設定を行うことで、Zoom アプリケーションを用いたミーティングがスムーズに行なえます。
こちらの設定項目を行う前にZoom登録とサインアップを行う必要があります。
→ Zoom への登録とサインアップ

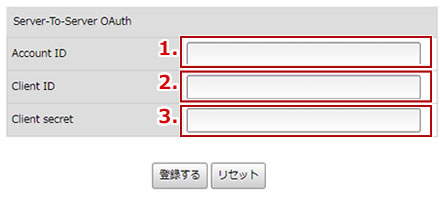
| 1. | Zoom アプリケーションへの登録とサインアップの設定を行い、Account IDを入力する必要があります。 |
|---|---|
| 2. | Zoom アプリケーションへの登録とサインアップの設定を行い、Client ID Secretを入力する必要があります。 |
| 3. | Zoom アプリケーションへの登録とサインアップの設定を行い、Client secretを入力する必要があります。 |
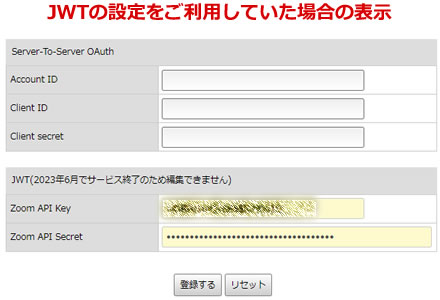
Hotbiz8のZoom連携によるJWTは2023年6月をもって利用できなくなります。
[Server-to-Server OAuth]へ移行し、リリース時点をもってJWTに新規の登録できなくなります。
JWTの設定はそのままサービス終了まで利用できますが新たに登録・変更はできません。
JWTを従来ご利用していて、引き続きのご利用をお考えの場合は、下記の[Server-To-Server OAuth]を利用してのサインアップをする必要があります。
Zoom API を利用する際に必要となるアクセス・トークンの生成
(「Server-to-Server OAuth」を使用)
連携の設定の前にはZoomへの登録を済ませる必要があります。
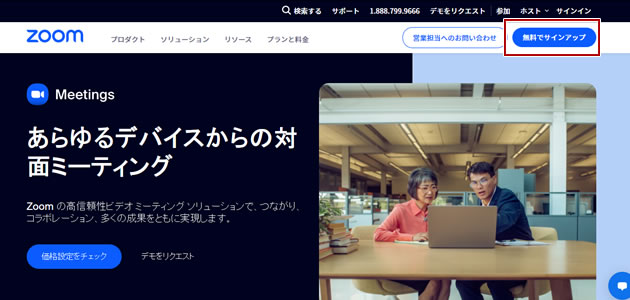
画面右上「無料でサインアップ」からZoomに登録を行います。
登録は無料です。
なお、サインインするユーザーは「管理者」または「サーバー間 OAuth アプリ」(Server-to-Server OAuth)の権限が必要です。
Zoom App Marketplaceにアクセス
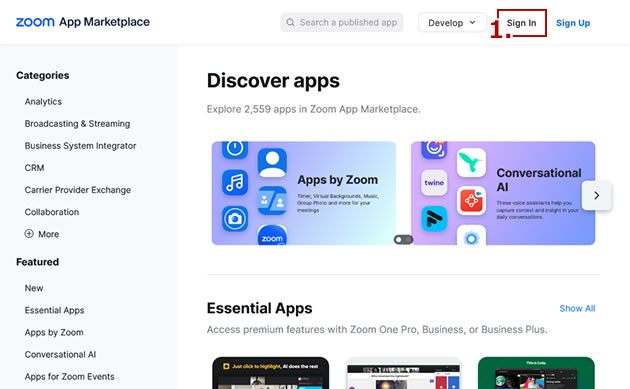
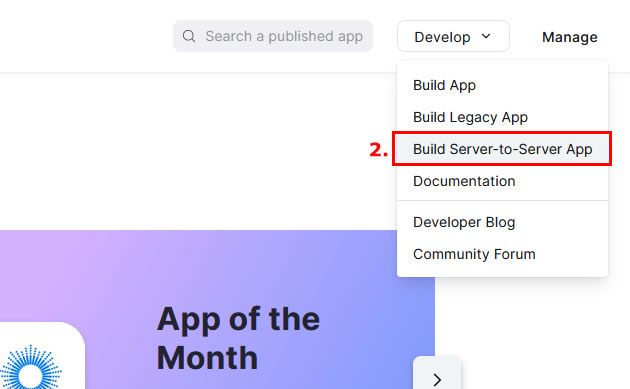
1. Zoom App Marketplaceにアクセスし、右上の「Sign In」からZOOM連携設定するユーザーでサインイン
します。
2. 右上プルダウンメニューの「Build Server-to-Server App」を選択します。
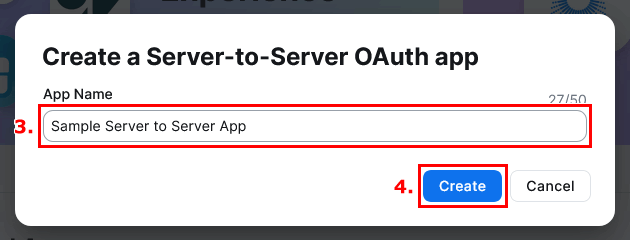
Create a Server-to-Server OAuth app
3. 表示されたポップアップウィンドウの入力欄の「App Name」に登録名を指定します。
ここでは「Sample Server to Server App」と指定しています。
4. 青色の「Create」を選択し次に進みます。
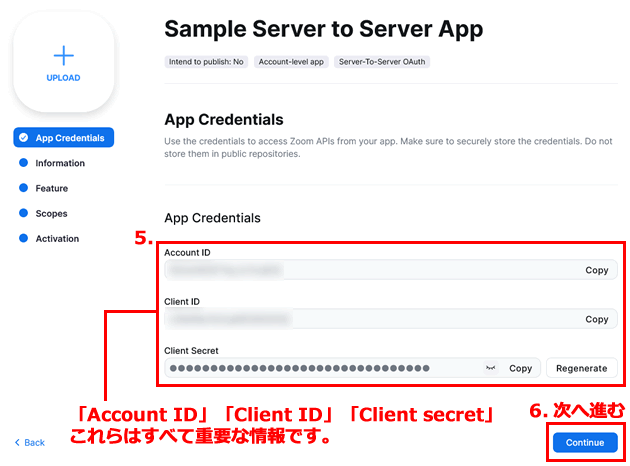
App credentials
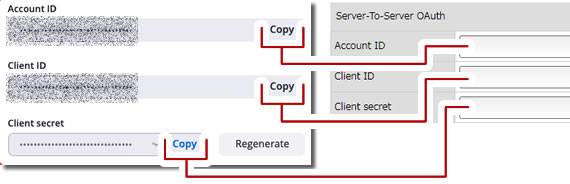
5. 最初に表示される画面の項目「App credentials」には、
「Account ID」、「Client ID」、「Client secret」が表示されています。
これらは後ほどトークンの生成の際に必要な情報です。
欄内の[COPY]をご利用になるなどの方法を取り、控えておいてください。
6. 画面右下に表示された青色の「Continue」を選択し次に進みます。
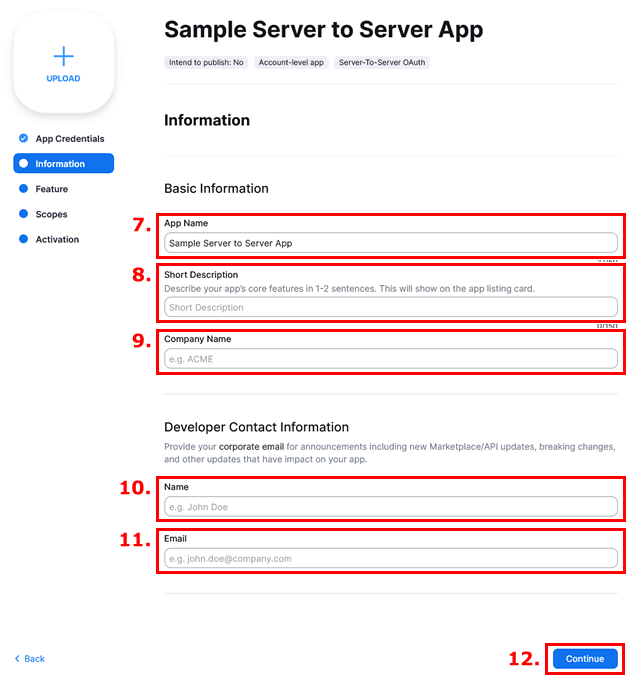
Developer Contact information
7.「App Name」にアプリ名を入力します。
8.「Short Description」にアプリの説明を入力します。
9.「Company Name」に会社名を入力します。
10.「Name」に名前を入力します。
11.「Email address」にメールアドレスを入力します。
※ 重要な変更事項や通知をメールアドレス宛に送付される場合に使用されるため利用可能なメールアドレスを指定ください。
12.「Continue」を選択し次に進みます。
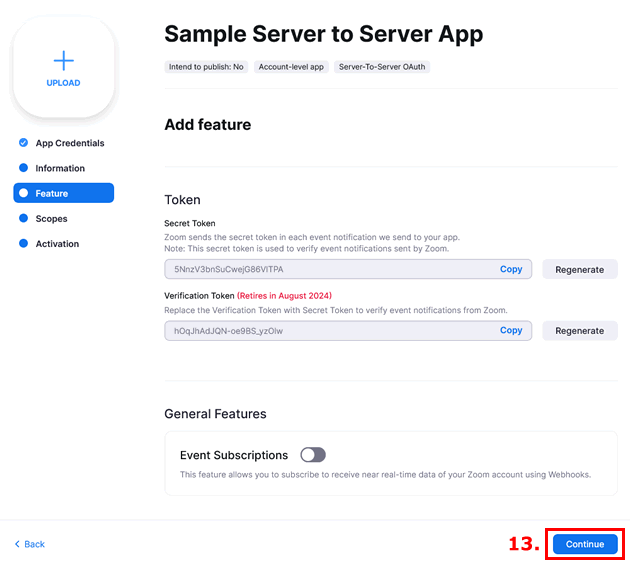
Add feature
13.次の項目(「Event subscription」)はWebHook通知機能を有効にするための設定です。
ここでは割愛し、画面右下に表示された青色の「Continue」を選択し次に進みます。
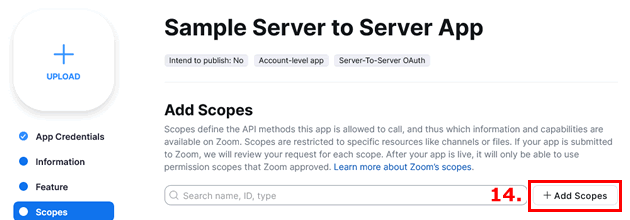
Add Scopes
「Add Scopes」の画面に表示が切り替わります。
こちらの画面ではトークンでアクセスできるAPIの範囲を指定します。
14. 右下の「+ Add Scopes」を選択して、ポップアップウィンドウを開きます。
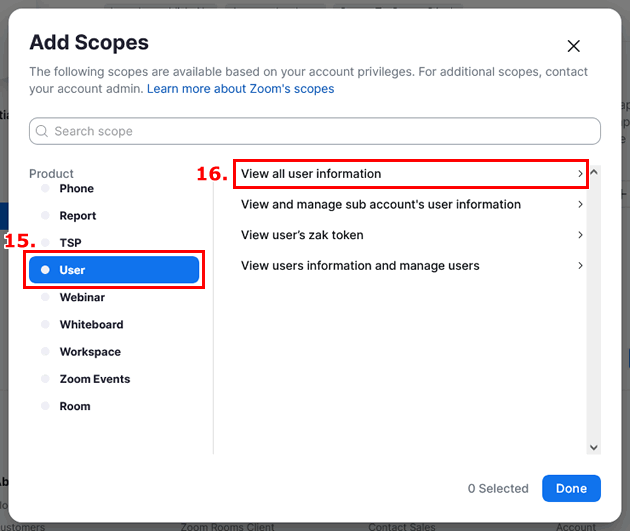
15. トークンの設定のために、左メニューの[User]を選択します。
16. 右で「View all user information」を選択します。
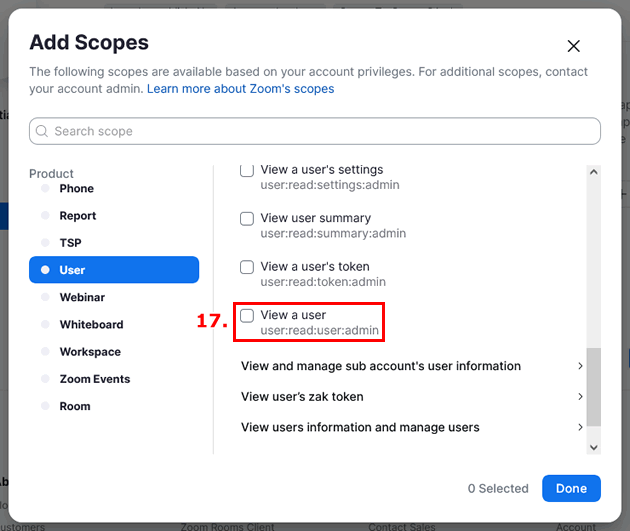
17. 範囲設定を [View a user(user:read:user:admin)]と設定します。
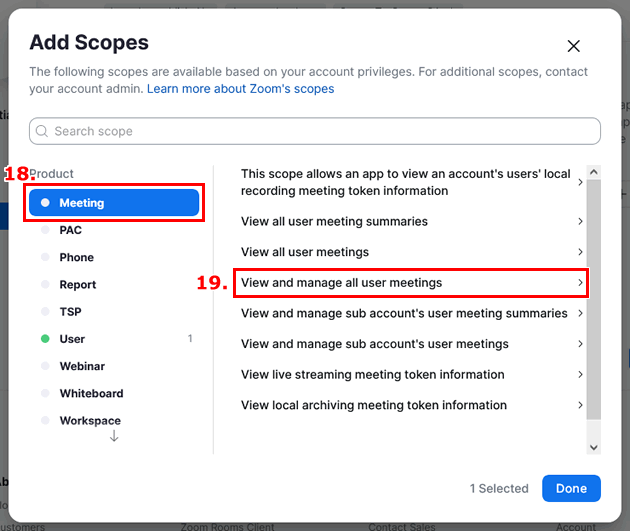
18. 引き続き、左メニューの[Meeting]を選択します。
19. 右で「View and manage all user meetings」を選択します。
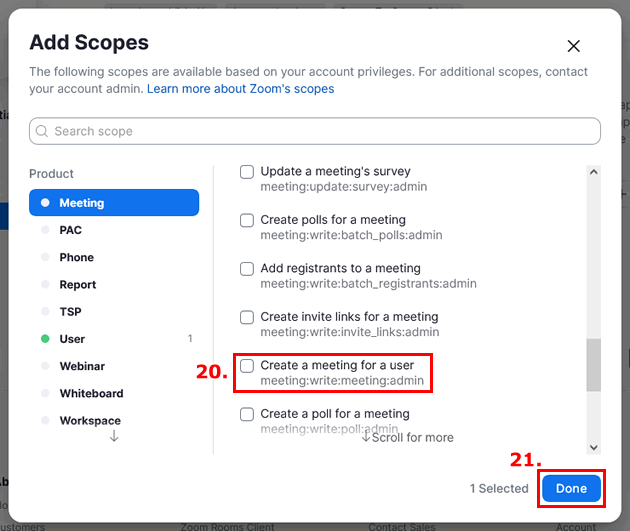
20. 範囲設定を [Create a meeting for a user(meeting:write:meeting:admin)]と設定します。
21.「Done」ボタンを押します。
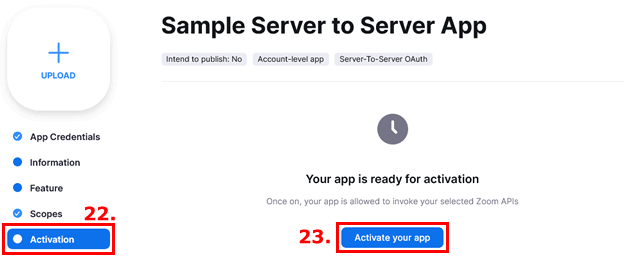
22. 最後に左メニューから「Activation」を選択します。
23.「Activate your app」ボタンを押して有効にします。
有効化の後は、HotBiz8上で必要な情報を入力することで、Zoom連携のご利用が可能になります。
「Account ID」と「Client ID」と「Client secret」の入力
HotBiz8設定画面の「ZOOM連携設定」を表示して、「Account ID」、「Client ID」、「Client secret」の欄に、[Copy]コマンドを利用し、上記のコピーしておいた事項を記入して登録してください。
登録が完了すると、予定表機能にZoomミーティングが追加されます。